DOT

/DOT

6 Tips For Effectively Communicating With Your Suppliers

Tips To Improve Communication Between You And Your Suppliers

Communication is a critical component of any construction project–it’s also one of the biggest pain points for construction professionals today.

While communication is important in any industry, the essential role it plays specifically with regards to construction is not to be understated. Poor communication between key players on a construction project can equate to huge monetary losses, safety hazards, missed deadlines, and an overall unsuccessful finished product. Good communication in the construction industry is the difference between a project that’s completed on time and on budget, or a complete disaster.  

As a large concrete supplier with over 60 years of industry experience, we’ve seen first hand the toll poor communication can take on the overall success of a construction project. We also know improving communication is a two-way street–suppliers like us have just as much to lose if communication isn’t up to par.

That’s why we’ve put together a list of tips for suppliers (like ourselves) and top construction professionals, decision makers, contractors, subcontractors, and/or project managers (like you), for improving communication.  

1. Get On The Same Page From The Start

Discuss your process, priorities, and goals for the project at the very beginning of the partnership. The initial meeting is a great time to get it all out on the table. When a supplier understands what is important to you and the project, they’re able to work with that in mind. When partners work with the same goal in mind, great things happen.   

Having similar goals and values as your supplier is an important factor to consider as you start your supplier selection process.

2. Avoid Using Industry Jargon and Buzzwords

We’ve worked in the concrete industry for 60+ years. Some would say we’re experts in all things concrete. But that doesn’t necessarily mean you are! And vice versa.

We both work in the construction industry and while we have a general understanding of what the other does, messages sometimes get lost in translation when industry-specific jargon and buzzwords are used. Ensure each party is able to understand the details of the project by using general terms each is likely to understand. If a concept is foreign, take the time to explain it.

3.  Identify Your Chain Of Command And Points Of Contact

When you or your supplier doesn’t know who to contact with a question, concern, complaint, problem, etc–it can be frustrating. This is particularly a problem on a construction project where there are so many different parties involved.  

Don’t assume that because your chain of command is documented in the contract, that other parties understand it. The best way to avoid confusion is to provide a single point of contact. This person should hold some authority, be organized, have good communication skills, be willing to feed information to the rest of the team and make executive decisions. With a single point of contact, your back and forth messaging will remain consistent and create less opportunity for misunderstanding.

4. Define The Rules Of Engagement

Set the standards for efficient and effective communication. Each party involved will have different communication expectations, strategies, and techniques–find a common ground! Here are some suggestions to get you started:

  • How often will you provide updates and reports? How often will you expect updates and reports?
  • What channels or methods of communication will be used? (A communication tool or software that both parties are familiar with can be a powerful way to operationalize effective communication.)
  • Are there certain hours or days when either party isn’t open to being contacted?
  • How much notice is required for cancellations, timeline changes, etc.?
  • What information do you need from the other party and when?     

5. Be Transparent

Often in construction, changes are made to the plan or timeline quickly, problems arise that are out of your control, or someone makes a mistake (hey, we all make ‘em!). Whatever it is, be transparent with all parties involved. You’ll want to give everyone else plenty of time to readjust to the changes that were made.

Transparency is critical in fostering a trusting and successful partnership free of tension and conflict.

6. Practice Active Listening

Listening is an essential, yet often forgotten part of communication. You must accurately receive a message in order to accurately relay it to your team. Poor listening has ruined its fair share of relationships, don’t let it add tension to yours.

The best listeners make eye contact, ask relevant questions, mirror gestures and expressions, don’t interrupt, and paraphrase what was said to show they understand.

Often times, just by listening attentively to one another we’re able to solve problems before they even arise. Wouldn’t that be nice?

These tips will ensure effective communication between you and your suppliers, therefore decreasing the tension put on the relationship and increasing the likelihood that your project is successful!

Though there are steps that can be taken throughout your partnership with a supplier to improve communication, it helps if you select a supplier who has a strong and proven track record for thorough communication.

During your supplier pre-qualification process, don’t be afraid to question the supplier’s communication techniques. If they don’t align with your preferences or needs, it may be an indication that the relationship wasn’t meant to be.

For more on how to choose the right supplier for your project, download our guide to pre-qualifying suppliers. The guide will help construction decision makers like you, develop a process for measuring a supplier’s ability to complete a project.

Download your copy of our Guide to Pre-qualifying Suppliers and start developing your team’s pre-qualification process.  

Show Me How To Pre-qualify Suppliers
a contractor practicing effective communication with their suppliers
2019-03-19T14:50:57-04:00

A Step-By-Step Guide To Evaluating A Supplier’s Performance

Supplier Performance Management: A Step-By-Step Guide To Evaluating A Supplier’s Performance

Many companies rely heavily on their supplier’s performance for various aspects of their business process. Whether your suppliers provide materials, labor, equipment, or services, it’s likely that they play a critical role in your business’s overall success. With so much on the line, you must depend on your supplier’s ability to be timely, deliver high quality, maintain a professional relationship and keep your best interests in mind.

If your business’s day-to-day operations involve a supplier, it’s important to prequalify and select the right man for the project initially, but also to continuously evaluate their performance throughout the partnership. Through the evaluation of a supplier’s performance, companies can ensure and maintain the best service while eliminating suppliers who fail to comply with performance requirements.   

Supplier performance management is a business practice that is used to measure, analyze, and manage the supplier’s performance in an effort to cut costs, alleviate risks, and drive continuous improvement for both yours and your supplier’s teams.

The businesses that have the best luck with suppliers have a formalized system in place to track and evaluate their supplier’s performance. Some might even credit the smooth operation and profitability of their companies to their supplier evaluation process.

Step One: Establish An Evaluation Criteria

It’s important to determine what characteristics your suppliers need to have, demonstrate, and maintain in order to continue doing business with your company. From the start of the relationship, they should be entirely aware of these characteristics and know that they will be regularly (monthly, quarterly, annually) evaluated based on them.  

Your business’s industry, processes, and specific needs will dictate the criteria used to evaluate the performance of your suppliers. Your criteria may include:

Accuracy

Has your supplier delivered the right goods or provided the right services? How often do you come across product flaws or service mistakes? If the success of your business hinges on the accuracy of your suppliers, this is an important factor to evaluate on.

Timeliness

Does your supplier do their very best to stick to your timeline? Now sure, depending on the industry, certain things might come up that are out of your supplier’s control. But if a supplier is frequently late with no explanation, it’s your business that suffers.

Responsiveness

Does your supplier respond to your inquiries or concerns? When you make an order, have a question, or need to address a concern, are you able to get in direct contact with a representative? Believe it or not, a supplier who prioritizes responsiveness can save you a lot of stress!

Capability and Flexibility

Can you depend on your supplier to meet and accommodate your needs on a regular and/or long-term basis? It seems like a no-brainer, but you’ll really want to ensure your supplier can meet your needs.

Quality Control

Does the supplier consistently provide you with the best quality goods and service? How is the service? Consider the owner, sales rep, delivery drivers, and accounts receivable. Are they people you enjoy and are comfortable doing business with?

You may have noticed we left a somewhat important factor off the list–cost. While cost is a big factor in choosing and evaluating a supplier, it should not be a factor you weigh the heaviest on. Instead, focus on the factors we’ve listed. Keep in mind, a supplier can have the lowest price but the lowest quality of work, too.

Once you’ve established criteria for evaluation, you can proceed with your evaluation process.  

Step Two: Classify Suppliers For Evaluation

If your supply chain is made up of multiple suppliers, each of whom covers a different aspect of your business process or has more of an influence on your business than another, it wouldn’t make sense to evaluate them all the same way.

Decide how to classify your suppliers and then evaluate them according to the effect they have on your business process. By divvying up suppliers into two categories, such as critical and non-critical or primary and secondary, you can devote more time to measuring the performance of your critical suppliers.

Step Three: Determine Roles In The Evaluation Process

Though it will depend on the resources you have available to allocate towards the process–this classification step will help you determine who in your organization should be responsible for evaluating which supplier. There likely isn’t a single member of your organization who gets the full picture of each supplier’s performance. Those who work closest to the supplier should complete the evaluation. From there, who will be responsible for reviewing and making decisions based on the evaluation?

Step Four: Lay Down A Method For Evaluation

There are a few techniques businesses will use for rating a supplier’s performance. Techniques include evaluation forms, surveys, system metrics, and software applications.

You might consider crafting a survey that asks your own employees to rate and answer questions pertaining to the supplier. You can review how many corrective actions and/ or warnings you had to issue a supplier. Look at how many products you had to scrap or return because the supplier failed to meet specifications. You may also choose to monitor suppliers through a periodical auditing process.

The bottom line is that you need to determine a method that will allow you to generate reports throughout the course of the relationship.

Step Five: Know When To Say Goodbye

As you monitor a supplier’s performance, you have to decide when to praise them and when to issue a red flag or part ways.

Be sure to show appreciation for a job well done. Continue to do business with suppliers who consistently demonstrate excellent performance.

If you have a supplier you feel isn’t performing to their full potential, or to your expectations, raise a red flag, issue a warning–whatever you feel is necessary. By giving a warning, you give the supplier an opportunity to correct the problem. Remember, it’s not about reviewing your supplier’s performance as much as it’s about helping improve your partnership.

Finally, there’s no reason to tolerate ongoing bad service or a partnership that isn’t mutually beneficial. You may have to let go of a supplier that is underperforming or a bad fit–that’s ok!

Now, of course, a prerequisite to evaluating your suppliers is prequalifying and selecting them. Prequalify the right supplier from the get-go, and you’ll mitigate the risk of selecting the wrong supplier.

See our Contractors Guide to Pre-Qualifying Suppliers for more on how a contractor can establish a pre-qualification process that leads them to the right supplier for their project.   

At the end of the day, the relationship you have with your suppliers is a business partnership. If both parties are working to make sure the partnership is a success, it will be!

Contractors Guide To Pre-Qualifying Suppliers

Have questions? We’d be happy to answer them from a supplier perspective. Contact us here!    

contractor overseeing supplier's performance
2019-03-19T15:11:38-04:00

Concrete Construction Hazards With Solutions From OSHA

Concrete Construction Hazards and Our Solutions From OSHA

Like many labor-intensive jobs, there are a few occupational safety hazards of working in the concrete construction industry.

At Concrete Supply Co., we believe you, your co-workers, supervisors, and project managers should take the necessary steps to eliminate the potential dangers that exist on your worksite. Our goal is to ensure each worksite is safe for all.

Keep in mind, even the most basic of concrete worksites can be filled with safety hazards.

Throughout our 60 years in the residential, commercial, and DOT concrete construction industries, we’ve become very familiar with the hazards that exist on site. With that being said, we’ve also become accustomed to following OSHA’s specific concrete construction guidelines in order to avoid hazards and keep the site safe.

When it comes time to start your next concrete construction job, plan ahead in a way that prevents the following hazards:

  1. Chemical burns
  2. Respiratory irritation, illness, or infection
  3. Injuries for improper lifting
  4. Form blowout
  5. Injuries from falling objects
  6. Falls from elevated platforms
  7. Vehicle accidents

Then, implement the guidelines mandated by OSHA to solve or eliminate the concrete industry hazard from your work zone.

Irritation, Dermatitis, and Burns

Any type of direct contact with wet concrete can quickly lead to skin irritation, dermatitis, or worse, a chemical burn.

Think about it–as concrete hardens it absorbs moisture. The chemicals in cement pull moisture out of anything to aid in the drying process.

When cement pulls the moisture from skin, it leaves behind severely damage skin cells. Once concrete hardens, if left untreated, the skin will begin to blister, swell, and bleed, eventually becoming a second to third-degree burn.

The most severe cases of skin coming in direct contact with concrete have led to scarring, the need for skin grafts, and even amputations. And the harmful effects of skin coming in direct contact with concrete are only worsened when admixtures are introduced to the concrete mixture.

OSHA reports that concrete workers in the U.S. lose four times as many workdays for skin problems compared to other construction trade workers.   

If you or your crew are working with fresh concrete, extreme care should be taken to avoid and treat skin irritation and/or chemical burns. Always wear protective equipment such as waterproof apparel, tall boots, alkali-resistant gloves, long pants, and long sleeves while on site. If skin irritation persists or in the case of a deep burn, seek medical attention immediately.   

OSHA also mandates that employers must supply workers with alkali-resistant gloves and coveralls, as well as provide access to emergency washing stations in order to avoid burns from contact with wet concrete and cement.

Find more of OSHA’s respiratory protection guidelines.

Respiratory Irritation

Exposure to dust from dry concrete mixtures can irritate the respiratory system, leading to various infections and illnesses. In the short term, inhaling concrete dust can irritate the nose and throat making it difficult to breathe.

Know that dust from sanding, grinding, cutting, pouring, and mixing concrete can find its way into the air you and your crew breath.

Therefore, OSHA requires employers to provide persons who perform or are in the area of any of the previously mentioned actions with suitable respiratory protective equipment. This equipment can include a P-, N- or R-95 respirator or face mask to minimize inhalation of cement-related air pollution on site.

When you mix your own concrete on the job site, there is an increased risk for breathing it in. You can prevent the likelihood of breathing a mix’s dust in by having a supplier, like Concrete Supply Co. create the mix in their controlled plant and then delivering it to your site by truck. See the various project’s we’ve safely mixed and delivered ready-mixes to in the past.

Improper Lifting Injuries

While injuries from lifting are common on construction sites, they tend to be especially common with concrete construction due to improper lifting techniques. At about 150 pounds per cubic foot, even a small piece of concrete can weigh enough to cause serious, long-term damage.

Safe lifting procedures and load-carrying techniques will almost always prevent painful and expensive injuries on the job site. When moving items over 50 pounds, use a forklift or lift the load with another individual on the job site. If you must move heavy objects manually, lower and lift with the knees, not the back, and avoid twisting while carrying heavy items.

OSHA encourages employers to train employees on how to lift safely and to implement effective ergonomic (the science of designing the job, equipment, and workspace to fit the worker) programs. Doing so will help ensure a workplace free of hazards.

Read more on how OSHA recommends preventing lifting injuries.

Vehicle Accidents

Often a concrete construction site requires large, heavy-duty pieces of construction equipment and vehicles to operate within a tight work zone–a disaster waiting to happen. When vehicles and other types of mobile equipment are operated improperly by untrained workers, the risk of injuries or even fatalities in the work zone is possible.

It should be known that working on a highly active site is serious. This is not the place for anyone to cut corners or cheat on safety. Encourage your workers to remain highly vigilant and always pay attention. This will vehicle accidents to a minimum.

According to OSHA, you can further prevent concrete construction site accidents by:

  • Allowing only workers who are extensively trained to operate equipment. (If a trained worker is not available, bring in an experienced outside professional for concrete pours and other specialty work.)
  • Supplying workers with high-visibility safety apparel.
  • Using temporary traffic barriers throughout the workspace to notify drivers of clearances, speed limits, duration and type of operations, volume of traffic, etc.
  • Planning and setting up the work area in a way that allows for any possible type of maneuvers. (Consider the size of any construction vehicles or equipment that may enter the site.)
  • See more from OSHA on site vehicle safety.

When it comes to any concrete vehicle-related operations, be sure they are conducted under the direct supervision of a competent supervisor.

Form blow-out

When using concrete formworks, blow-outs are a very scary but oh-so-real possibility.

The term “blow-out” refers to a break in the form. Form blow-out is due to the pressure from liquid concrete during the concrete placement and consolidation. A blow-out can result in catastrophic effects not only on the structure itself, but injuring workers who may have been working on the structure.  

OSHA states that formwork shall be designed, fabricated, erected, supported, braced and maintained so that it will be capable of supporting without failure all vertical and lateral loads that may reasonably be anticipated to be applied to the formwork.

Find a Supplier Who Mitigates Concrete Construction Hazards and Adheres to OSHA Standards

While the listed are general concrete industry hazards, every worksite should have a competent individual or team of individuals responsible for performing an assessment of the site-specific hazards and measures that should be taken to limit them.

Site management should be responsible for ensuring all equipment is routinely serviced and maintained in a safe condition. This is done by conducting periodic on-site inspections of operations, and providing operation and safety training for relevant employees. Site supervisors should continuously observe operation safety, provide immediate corrective training for all unsafe acts, and conduct pre-pour inspections. Employees and crew members should follow all safety and operational procedures and immediately notify supervision of all unsafe conditions. Together you can maintain a safe working environment. 

The reality is, hazards exist on any concrete construction site. But there are steps you can take to control and limit incidents–keeping your entire team safe. Take a look at Safety Data Sheets for Concrete Supply Co. which outline our specific safety practices on our site.

If site safety is a top priority of yours, you should find a concrete supplier who also values safety. Safety is something that is sure to come up during the pre-qualification process. See our guide to pre-qualifying suppliers for more important qualities to look for in a concrete supplier.

Download The Contractors Guide To Pre-Qualifying Suppliers


Feel free to contact an experienced project manager on the Concrete Supply Co. team. We would be happy to discuss how we can help you limit the hazards and dangers lurking on your site. Contact us today!

Contact Us

Get a Referral/Estimate
hard hats for safety on a concrete construction site
2019-03-19T14:53:31-04:00

Concrete’s Impact on Building and Infrastructure Resilience

Key Decision Makers Can Enhance Resilience By Choosing Concrete.

Today, Americans are entirely aware of the damage a natural or manmade disaster can have on a community.

From the recent California Wildfires that burned entire towns down; to Hurricanes, Michael, Florence, and Irma that brought more wind and rain than we could have imagined; on top of countless other disasters including floods, tornadoes, and earthquakes that wreaked havoc on our nation this year–we know quite well how serious these disasters can be.  

While no one is completely out of harm’s way when it comes to these disastrous events, key decision makers like city planners, architects, designers, and builders can make decisions that enhance a community’s infrastructure resilience. One of those key decisions is to build with concrete.

What Makes Buildings and Infrastructure Systems Resilient?

The National Infrastructure Advisory Council defines infrastructure resilience as the ability to reduce the magnitude and/or duration of disruptive events.

The effectiveness of a resilient building or infrastructure system depends on its ability to anticipate, absorb, adapt to, and/or rapidly recover from a potentially disruptive event. Essentially, how quickly a community is able to restore energy, transportation, clean water, and communication services to residents after a disaster is the measure of a community’s infrastructure resilience.

Community facilities such as fire, police, health care, government entities, and designated shelters or residential units are typically built to the highest resilience.

The Impact Of Material Selection On Resilience:

A community can gain resilience when buildings are constructed in a way that allows them to withstand intense, disastrous events. As you can imagine, this type of resilience weighs heavily on the material selection process.

Resilient communities start with comprehensive planning and include stricter building codes that produce strong, long-lasting structures. As someone responsible for planning and designing buildings and infrastructure systems, it’s important to recognize the opportunity for resilience throughout the material selection process.

The most common building materials include wood, brick, stone, steel, iron–all of which have pros and cons.

Take wood for example. Wood is a very common building material boasting qualities such as being: strong, lightweight, and easy to use. But it should be noted that wood is easily prone to decaying and damage due to moisture, pest infestation, fire, and whatever other harsh environmental elements might come about.

A material that can be incorporated in several key aspects of a building or infrastructure system project to make it more durable and disaster resistant is concrete.

Read more of our construction need-to-knows for material management success.

Concrete Makes Buildings And Infrastructure Systems Resilient.

Nobody can deny concrete’s strength, durability, longevity, and inherent resilience, among many other benefits.

Today, concrete is the only building material that cost-effectively delivers:

  • Energy efficiency through thermal mass
  • Sound insulation
  • 100% recyclability–considered a sustainable building materials!
  • Durability in any type of environment
  • Low carbon footprint for a structure or surface throughout its lifecycle
  • Safety and security
  • Versatility in shape, color, pattern, etc.
  • Low maintenance costs
  • Abundance of mix materials (water, air, gravel, sand) almost everywhere
  • Resilience

Concrete doesn’t burn, rust, or rot. It’s resistant to fire, wind, water, vibrations, and earthquakes.

Moreover, concrete provides resiliency in the form of weight and mass. Think about it, concrete is physically heavier than most other building materials. It’s due to this quality that concrete structures are able to resist almost any force a disastrous event may unleash.

Below you can see the resilience of concrete wall systems, floor systems, finishes, roof tiles, storm shelters, retaining walls, and pavements in the face of various conditions.chart showing the resilience of concrete

As a stakeholder, designer or builder, it is in your best interest to consider how you can contribute to a building or infrastructure system’s resilience. A concrete wall, floor and/or roof system can provide your structure with the best combination of strength, security, and resilience.

Put it in Concrete Terms:

When you choose to build with concrete, you’re able to enjoy peace of mind knowing that you are providing unsurpassed safety and security for the building or community’s occupants. You’ll play a part in limiting the risk for costly property damage and/or losses, ensuring long-term continuity, and enhancing overall building resilience.

The same piece of mind you’ll enjoy knowing you chose to build with a resilient building material like concrete, is the piece of mind we enjoy knowing we supply our clients with a quality and well designed ready-mix concrete!

At Concrete Supply Co., we’ve made it our mission to be the premier provider of quality ready-mix concrete and related services while acting in the best interest of our employees, customers, shareholders, and the community.

We strive to embody our values of integrity, family, customers, teamwork, community, industry, and profitability in everything we do–something we feel is important to find in any supplier.

Learn more about who we are at Concrete Supply Co

If your next concrete project requires concrete that is extra strong, be sure to let your ready mix supplier know. Your ready-mix can be mixed in a way that contributes to the strength. A strong concrete ready-mix will ultimately allow you to have a more resilient building. For more on how to get the best ready-mix for your job, download our checklist.

Download Checklist
resilient city infrastructure
2019-02-11T10:41:28-04:00

Cold Weather Concreting 101

Cold Weather Concreting Is Possible When Certain Precautions Are Taken

Construction doesn’t stop–it’s a year-round industry. This means concrete mixes, pours and placements are needed all year and cannot come to a halt due to less-than-ideal weather conditions.

While concrete can be mixed and poured during the cold weather, there are many things to keep in mind which we plan to detail throughout this blog.

  • First, we’ll explain what can go wrong while pouring concrete in cold weather conditions.
  • Then, we’ll discuss how your ready mix provider can help you overcome the problems associated with cold weather concreting.
  • Finally, we’ll warn you of the mistakes we frequently see when it comes to cold weather concrete pouring and tips to avoid making those mistakes.  

Before we start, we feel it’s important to all get on the same page as to what exactly “cold weather” is considered.

The ACI or American Concrete Institute says in their ACI 306R-10 “Guide to Cold Weather Concreting that “cold weather exists when the air temperature has fallen to, or is expected to fall below 40℉ during the protection period*.” So if you find yourself grabbing a jacket on your way out the door, consider the air temperature before mixing, pouring, or placing concrete.

*The “protection period” is defined as the time required to prevent concrete from being affected by exposure to cold weather.

The Two Biggest Problems Cold Weather Concreting Creates

Now, there are two big problems you’ll face when pouring concrete in cold weather.

Problem #1

Concrete must be protected from freezing at an early age. If concrete freezes prior to reaching an initial strength of 500 psi it will not achieve its intended strength.

A general rule to keep in mind is that once the concrete has gained a strength of about 500 psi, it can withstand the effects of one freezing-and-thawing cycle. Exterior concrete should be air entrained and at the minimum required strength prior to exposure to multiple freezing-and-thawing cycles.

Problem #2

Concrete sets more slowly when it is cold but especially slow when temps are below 40℉. Below 40℉ the hydration reaction basically stops and the concrete will gain strength at a very slow rate.

To help your concrete reach that 500 psi strength ASAP, your ready-mix provider can add to (or change-up) the mix in ways that will get it to set more quickly. Those mix add-ins and changes are explained further below.

Mix adjustments alone can only do so much and its possible additional precautions are required to provide temporary heat prior to, during and after a concrete placement to aid in maintaining the concrete temperature once in place.

Mix Changes Your Ready-Mix Supplier Can Make To Help Your Cold Weather Concrete

Many of the problems experienced with cold weather concrete pouring can be overcome with an experienced ready-mix producer’s assistance. A concrete mix can be manipulated in ways that allow it to set and strengthen quickly.

  • Hot water – As temperatures get colder most producers can start using hot water in the mixing process when requested to meet a minimum placement temperature.
  • Slump – The slump required from any ready-mix is dependent on a variety of things. A slump that is less than 4 inches can reduce bleeding. Since the concrete sets slowly in the cold, bleeding starts later, lasts longer, and you’ll see more bleed water.
  • Accelerators – Accelerators keep setting on a somewhat predictable schedule. Often times you’ll see the use of calcium chloride to speed up the hydration reaction. But consider this–calcium chloride can lead to corrosion of any steel embedded in the concrete and it can lead to a streaked and spotted surface appearance with colored concretes.
  • Non-chloride accelerators – Non-chloride accelerators are readily available and must be used any time there are embedded metals such as reinforcing steel. Non-chloride accelerators are also appealing because they don’t discolor concrete.

*Please note that accelerators should not be considered antifreeze agents. They work to increase the rate of the hydration reaction–not prevent freezing.

  • Fly ash –  Fly ash or slag cement may cause the mix to set slower and generate less heat compared to a straight cement mix. Your ready-mix producer will have straight cement options available upon request.
  • More internal heat – To make the reaction hotter, mixes with higher cement contents can be requested. You may consider ordering a concrete that is one or two classes higher in strength. The use of Type III cement may also be an option based on availability which is typically limited to larger metropolitan areas. Your mix’s internal heat can be used to your advantage, and you’ll see why a little later on in this article.

A quality concrete mix design is crucial for success in construction. At Concrete Supply Co. we believe in our ready-mix designs and their ability to help you achieve a successful cold weather concrete placement.

Avoid These Common Mistakes with Cold Weather Concreting

1. Placing concrete on a frozen ground

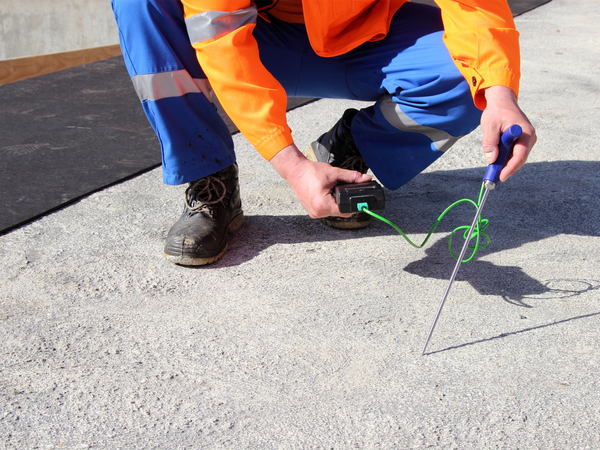
measuring ground temp

Concrete should not be placed on ground that is frozen or covered with ice or snow as it will have an immediate and long-term impact on the performance of the concrete. A frozen or cold subgrade will slow the set by lowering the in place concrete temperature reducing the effect of the hot water and/or accelerating admixtures when used. Frozen ground may also settle once thawed leading to potential settlement cracks.

2. Allowing concrete to freeze

Think about it this way, water takes up more space in its ice phase than it does in its liquid phase. So when the water used in your mix freezes, it expands, causing damage to the concrete. Do what you can to ensure your pour sets fast enough to prevent freezing. Additional precautions to prevent the in place concrete from freezing may be needed during the protection period.

3. Not taking advantage of heating techniques (or using them incorrectly)

Many times, heating techniques are used to prevent concrete from freezing (mistake #2). When it comes to flatwork, the best way to protect concrete from the cold is to cover it with blankets after it’s been finished. This is where you should take advantage of the heat concrete generates on its own. Blankets will keep your concrete warm even if the temperature goes below 20℉. Use layers of blankets at corners and edges that could freeze.

If blankets aren’t enough, try laying heating blankets on top of the slab or using hydronic heating pipes to keep the slab from freezing.

Still not enough? Enclose and heat the air with a temporary enclosure. While this option comes with its own problems and can run a pretty penny, it is sometimes your only option if the concrete pour has to happen. Be especially careful when using fuel-fired heaters. If your enclosure isn’t properly ventilated, carbon dioxide can build up and react with the concrete, causing the surface to become weak and dusty.

These same blankets used to protect the in place concrete after the placement can also be used to prevent the subgrade from freezing the day or night before the placement providing a warmer subgrade leading to faster set times.

4. Using cold materials

Not only is it important to ensure your mix, the ground, and the air are warm enough, the materials (forms, embedments, and tools) you use for cold weather concrete pouring should also be above freezing and close to the delivered concrete temperature if possible.

At Concrete Supply Co., we have experience with all types of ready-mixes, even mixes that will stand up to freezing conditions. If you need to pour concrete this winter, download our Get The Best Mix For Your Project Concrete Checklist, and be sure to specify that you’ll be looking to pour your mix during cold temperatures.

And remember, concrete can be poured during cold weather and develop sufficient strength and durability to satisfy requirements when the proper precautions are taken. A mix that is properly proportioned, produced, placed, and protected will survive the cold weather.  

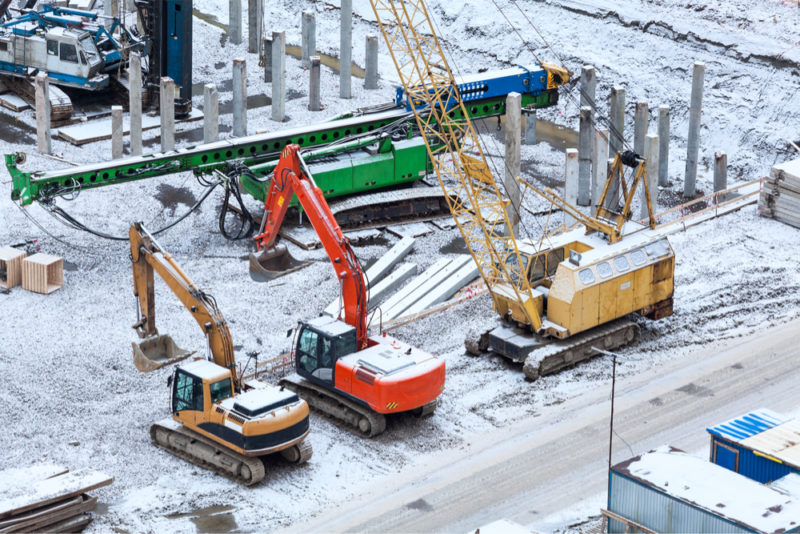
cold weather concrete site
2019-02-11T10:40:24-04:00

6 Types of Concrete Cracks and What They Mean

Six Common Types of Cracks in your Concrete

When you see a crack in your concrete slab or wall, your first assumption is typically that something has been done wrong–but that’s not always the case. Actually, concrete cracks are very common, some are even inevitable.

American Concrete Institute touches on the issue of cracking concrete in their American Concrete Institute manual, ACI 302. 1-40:

“Even with the best floor designs and proper construction, it is unrealistic to expect crack-free and curl-free floors. Consequently, every owner should be advised by both the designer and contractor that it is normal to expect some amount of cracking and curling on every project, and that such occurrences do not necessarily reflect adversely on either the adequacy of the floor’s design or the quality of its construction

We explain 6 of the most common types of concrete cracks below.

1. Plastic shrinkage concrete cracks

When concrete is still in its plastic state (before hardening), it is full of water. When that water eventually leaves the slab, it leaves behind large voids between the solid particles. These empty spaces make the concrete weaker and more prone to cracking. This type of cracking happens frequently and is referred to as “plastic shrinkage cracking”.

While plastic shrinkage cracks can happen anywhere in a slab or wall, they almost always happen at reentrant corners (corners that point into the slab) or with circular objects in the middle of a slab (pipes, plumbing fixtures, drains, and manholes). Since concrete cannot shrink around a corner, stress will cause the concrete to crack from the point of that corner.

plastic shrinkage cracks

Plastic shrinkage cracks are typically very narrow in width and barely visible. While nearly invisible, it is important to remember that plastic shrinkage cracks don’t just exist on the surface, they extend throughout the entire thickness of the slab.

An excessively wet mix is a contributing factor to shrinkage in concrete. While water is an essential ingredient in every concrete mix, there is such a thing as too much water. When the mix contains too much water, the slab will shrink more than if the correct amount of water was used. Hot weather is another big reason for plastic shrinkage cracks.

Control joints can be incorporated into the slab to prevent shrinkage cracking. The joints will open up as the concrete slab gets smaller.

2. Expansion concrete cracks

expansion cracks

Just like a balloon, heat causes concrete to expand. When concrete expands, it pushes against anything in its way (a brick wall or adjacent slab for example). When neither has the ability to flex, the expanding force can be enough to cause concrete to crack.

Expansion joints are used as a point of separation (or isolation), between other static surfaces. Typically made of a compressible material like asphalt, rubber, or lumber, expansion joints must act as shock absorbers to relieve the stress that expansion puts on concrete and prevent cracking.

3. Heaving concrete cracks

heaving cracks

When the ground freezes, it can sometimes lift many inches before thawing and settling back down. This ground movement brought on by the freezing and thawing cycle is a huge factor contributing to concrete cracking. If the slab is not free to move with the ground, the slab will crack.

Large tree roots can have the same effect on a slab. If a tree is located too close to a slab, the growing roots can lift and crack the concrete surface. Always consider this when laying a slab.

4. Settling concrete cracks

settling cracks

On the other hand, ground settling below a concrete slab can also cause cracking.

Settling cracks typically occur in situations where a void is created in the ground below the concrete surface. Think about when a large tree is removed from nearby and the roots begin to decompose or when a utility company digs a trench for their lines, pipes, etc. and don’t compact the soil when they refill it–these are examples of instances where settling cracks are likely to happen.

5. Concrete cracks caused by overloading the slab

overloading cracks

Although concrete is a very strong building material, it does have its limits. Placing excessive amounts of weight on top of a concrete slab can cause cracking. When you hear a concrete mix has a strength of 2000, 3000, 4000, or 5000+ PSI, it is referring to the pounds per square inch it would take to crush that concrete slab.

When it comes to residential concrete slabs, overload of the actual slab isn’t all that common. Instead, what is more likely to occur is excess overload on the ground below the slab.

After a heavy rain or snowmelt when the ground below is soft and wet, excessive weight on the slab can press the concrete down and result in cracks. Residential homeowners who place large recreational vehicles or dumpsters on their driveways are more likely to see this type of cracking.

6. Concrete cracks caused by premature drying

premature drying cracks

There are two common types of cracks brought on by premature drying.

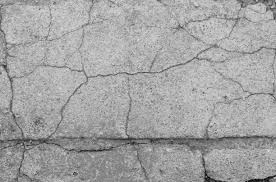
Crazing cracks are very fine, surface cracks that resemble spider webs or shattered glass. When the top of a concrete slab loses moisture too quickly, crazing cracks will likely appear. While unsightly, crazing cracks are not a structural concern.

Crusting cracks typically happen during the concrete stamping process, which is a way of adding texture or pattern to concrete surfaces. On sunny or windy days where the top of the slab dries out quicker than the bottom, the top of the concrete surface can become crusty. When the stamp is embedded, it pulls the surface apart near the stamped joints and causes small cracks around the outside edges of the “stones”. Again, while they don’t look great, crusting cracks are not a structural issue to be considered about.

It’s often difficult to determine exactly what caused a particular crack. Proper site preparation, a quality mix, and good concrete finishing practices can go a long way towards minimizing the appearance of cracks and producing a more aesthetically pleasing concrete project.

We can’t stress the importance of a quality mix design in concrete crack controlling. Read our Concrete Checklist: Get The Best Mix For Your Project, which will guide you and your concrete supplier towards creating the best mix for your concreting project.

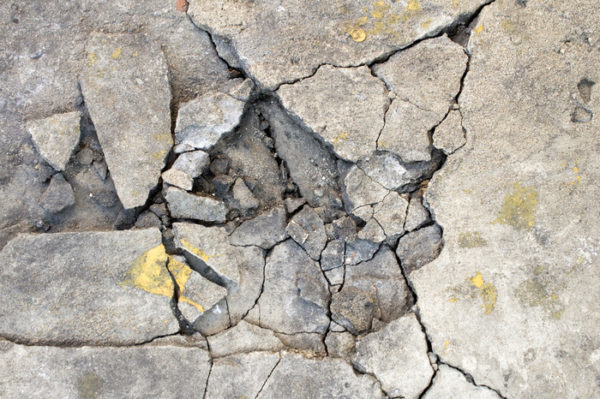
concrete cracks
2019-02-11T10:39:41-04:00

6 Factors To Consider When Choosing A Supplier

The 6 most important factors to consider when selecting a supplier for your project

Whether you’re taking on a project as a commercial construction PM, a DOT contractor, or a residential homeowner, you’ll most likely work with a third party or supplier at some point. Third parties like suppliers, vendors, contractors, subcontractors, or consultants are often key components in the overall success of a project.

The stakes are high when the responsibility of choosing a third party, more specifically a supplier, falls on your shoulders. We believe the following factors to be the most important when selecting which supplier might be best for your project.

1. Do the supplier’s goals align with your own?

It’s important to question your supplier’s mission, values, goals, and company culture when assessing whether or not they could be a good fit. When a company’s values align with your’s, it’s typically a good indication that the partnership work well. Differences in overall mission, values, goals, and culture could potentially lead to conflict somewhere throughout the project.

2. Is the supplier experienced?

Question whether the supplier has experience and what type of experience they have. Is it industry related? When a supplier is experienced, it’s usually a good sign that they also have expertise–expertise that will add value to your project and make everything run smoother.

3. Does the supplier claim to be flexible?

When it comes to construction projects, there are numerous uncertainties and changes that come about which requires flexibility on every party involved. A supplier’s ability to work with you, maintain flexibility, and respond to change is crucial. Do keep in mind that while it’s easy for a supplier to make a claim, reviews and past work often say more about how a supplier operates.

4. What type of product or service quality does a supplier provide?

Do some deep digging to understand the quality of the product or service the supplier provides. It should be obvious that your supplier’s quality will have a direct impact on your project overall. Again, refer to reviews and past work for a true picture of a supplier’s quality.

5. Will the supplier bring value to the project?

Each of the previously mentioned factors contribute to the overall value a supplier brings to your project. Does the supplier’s reputation for being experienced, flexible, and providing quality resonate with how you want your project to be perceived? Assess the value the supplier might bring to your project and then make your call. Remember that a supplier who brings strong value comes at a price.

6. All things considered, is the supplier’s cost fair?

Finally, with all things considered, is the cost the supplier is charging fair? Do you feel as though their product or service and their total cost of opportunity is truly worth it? And does that cost match up with your budget for the project?

Still don’t feel confident in your ability to select a great supplier? Find more helpful advice when it comes to selecting a third party supplier or contractor here.  

For over 60 years now, we’ve been a trusted supplier of ready-mix concrete. We’ve met the needs of some of the areas top commercial and residential builders and DOT contractors.

In need of a ready-mix supplier? We created a checklist that guides your concrete supplier to create the best ready mix for your project. Once you’re able to pinpoint the best supplier for your concrete project, download our list and get started.

concrete supplier
2019-02-11T10:34:25-04:00

The True Benefits Of Sealing Concrete

Regardless of the surface type, whether it be a decorative floor inside your home, a covered outdoor patio area, or your driveway, applying some type of concrete sealer is always beneficial. Here are a few reasons why sealing concrete is the way to go:

1. Sealing protects concrete from damage.

There are several reasons why a concrete surface might experience damage. The conditions it’s poured under, settlement, shrinkage, overload, and various other factors can all cause concrete to crack, spall, and flake.

A sealer protects your concrete surface from the various elements that can further contribute to damage. Oil, chemicals, salt, grease, weather exposure, UV rays, and moisture are all big ones. In the winter, when your driveway is covered by a layer of ice, water has the potential to seep below the surface of the concrete. This becomes a problem when that water freezes and expands separating the concrete. Sealer prevents moisture and other elements from seeping below the surface and negatively affecting your concrete surface.

2. Concrete should be sealed to protect from mold and mildew.

Because concrete is a porous material, it has a tendency to absorb moisture. When this moisture doesn’t dry and the surface is left wet for an extended period of time, mildew begins to form and mold begins to grow. You’ll know you have mold growing on your concrete by the greenish color that appears.

When you seal your concrete, you inhibit moisture from penetrating the surface and therefore prevent the development of mold and mildew.

3. Sealing concrete increases its longevity.

Generally speaking, concrete is a long lasting and durable material. Typically, a concrete driveway can last anywhere from 25-30 years unless it becomes damaged. In that case, it will likely need to be replaced sooner.

Sealing your concrete not only ensures your concrete surface is protected, but that it is long lasting. It should also be noted that compared to the cost of replacing a concrete surface, sealing is relatively inexpensive and easy to do–definitely worth a long lasting concrete floor, patio, slab, or driveway.   

4. The appearance of the concrete will be improved by sealing.

There is nothing too special about the appearance of concrete–hey, we’ll admit it! Right after concrete is poured, it has a rough look and over time can become discolored, while developing a dingy, old appearance.

Applying a sealer enhances the overall look of concrete. Most sealers keep your concrete looking new, while also smoothing and preserving color. Are you’re planning to stain your concrete surface? Is your concrete surface is indoors where you and your family will be walking barefoot? Will you’ll be placing furniture on your concrete surface and would prefer if it didn’t get scuffed up? Seal.

Most of these 2018 residential concrete trends require sealing for their appearance.

There are so many important reasons to seal your concrete surfaces. If you choose to forego sealing, you should know you’ll likely suffer some of these negative consequences.

Here are the negative consequences you could encounter if you do not seal concrete:

  • Like anything that is subject to harsh outdoor elements, (and oil, chemicals, grease, salt, etc) concrete will begin to fail prematurely.
  • Oxidation from the sun can begin to break down the concrete causing it to age quicker than normal.
  • In colder climates, moisture that penetrates concrete can freeze and thaw continuously causing the concrete to shift, crack, heave or buckle.
  • Mold and mildew can build up on concrete that has not been sealed.

Sealing concrete helps to maintain a durable and beautiful concrete surface for years to come.

While we just stressed the importance of sealing concrete for appearance, durability, and longevity, it all starts with a great ready mix. Before you start any concrete project, download our free Perfect Ready Mix Checklist. Your answers to the questions on this checklist will help determine exactly what kind of ready-mix your project requires–the best ready mix as we say/

concrete sealing
2018-10-24T19:48:38-04:00

Concrete Basics: Essential Ingredients For A Concrete Mixture

Concrete is and has been for thousands of years, a very popular building material.

Made up of just a few basic ingredients, concrete is the most widely used man-made material on the planet. Humans use more concrete than all other building materials combined.

So what is concrete exactly?

What goes into the most commonly used building material?

Concrete is a mixture of cement, air, water, sand, and gravel–it’s as simple as that!

Not exactly. The typical concrete mix is made up of roughly 10% cement, 20% air and water, 30% sand, and 40% gravel. This is called the 10-20-30-40 Rule–though proportions may vary depending on the type of cement and other factors.

Now let’s discuss each ingredient and the important role they play in your mix.

Concrete mix ingredients and their important roles:

Cement

Though cement makes up the smallest percentage of the mixture, it’s an essential ingredient in concrete. Cement serves as the glue that keeps everything else together. It’s also what allows the ready mix to harden once it’s placed. There are five different types of cement depending on what kind of concrete you’re looking to make:

  • Type I is used for most residential work
  • Type II is used in moderate sulfate conditions
  • Type III is used in climates where freezing is a risk
  • Type IV is used for special orders like industrial placements
  • Type V is used in extreme sulfate conditions

Types I and II are the most widely used residentially in the United States due to the relatively moderate climates we experience here.

Air and Water

For a mixture to be effective, some amount of air entrainment (tiny air bubbles) is needed in the concrete. Air-entrained cement ensures that excess water has a chance to expand when it moves through the freeze-thaw cycle. These air bubbles, however, must be microscopically small or else the ‘entrained’ air will turn into ‘entrapped’ air which leads to shrinkage and cracking.

Amongst all of the other essential ingredients involved in creating a mixture, water tends to have the largest impact. As a rule of thumb, the more water that you put into the mixture, the less strength the hardened mixture will have. Shrinkage and cracking are also probable when too much water is involved. Excess water will eventually evaporate out of the hardened concrete, causing the concrete to shrink and eventually crack.

An ideal amount of water can be measured by water to cement ratio, which should vary between .4 and .6. The higher the ratio, the weaker the concrete. A good way to test the solubility of your concrete is to perform a slump test. This will help to determine whether or not your mixture contains too much water.  

Gravel and Sand

As you can see, gravel and sand aggregates make up about 70% of the mixture. This high percentage makes the mixture more economical–as gravel and sand are both stronger and more cost-effective than the cement. A good ready mix will include proportionate amounts of both large (gravel) and small (sand).

The reason for this is that the gravel makes up the majority of the ready-mix and the smaller sand particles do a good job of filling in any extra spots that could otherwise be filled by unwanted air pockets.

Well there you have it, the ingredients that combine to create the most widely used building material in the world–concrete. As you can see, each ingredient and its ratio impacts the final ready mix’s quality and type. It’s important that you get the best ready mix for your specific job. That’s why we’ve created this Ready Mix Checklist to help you and your ready mix supplier create just what you need. Download your Ready Mix Checklist now.

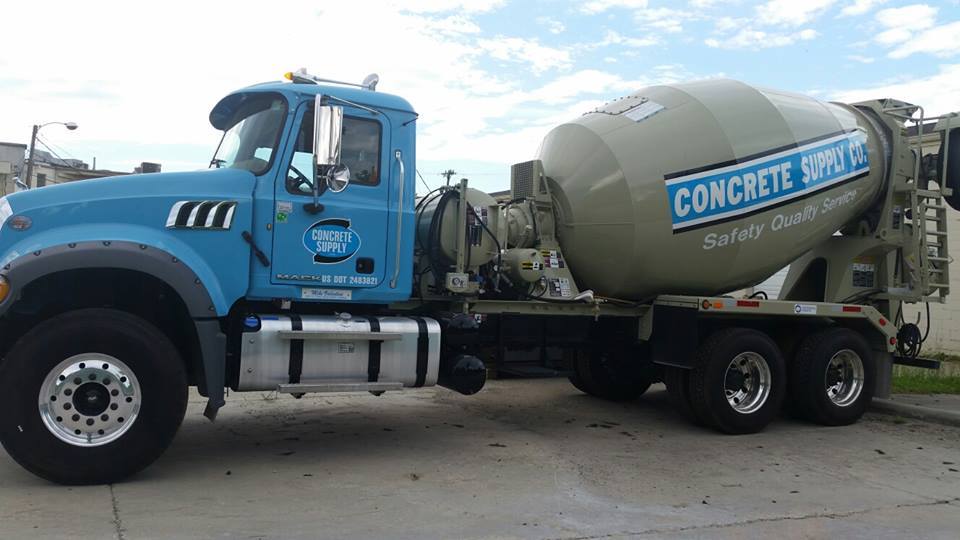
Concrete supply co mixing truck in front of plant
2019-02-11T10:32:10-04:00

The Importance of Concrete Mix Design

Why a good ready-mix concrete design is necessary

A good concrete mix design creates the foundation of a sound infrastructure.

Concrete mix design involves a process of preparation in which a mix of ingredients creates the required strength and durability for the concrete structure. Because every ingredient in the mix consists of different properties, it’s not an easy task to create a great concrete mix. It is imperative that all ingredients be tested to determine their physical properties and the bearing capacity of the project location.

The ingredients to be tested: water, fine aggregate (sand), coarse aggregate, cement, chemicals, reinforcement, and soil.

The values of the physical properties obtained after testing will be used as the basis for all concrete mix design considerations. This will ensure the structure will be sound and prevent failure of the mix. It is important to note that the ingredients for the mix might vary from one project location to another, so the physical properties must be tested for the requirements specified for each location.

Types of concrete mix

The two types of concrete mix are normal performance concrete and high-performance concrete, and they’re characterized by their compressive strength:

Normal Performance Concrete

A normal performance concrete mix has a performance strength ranging between 20 and 40 MPa. It is the more used mix of the two. Normal performance concrete has good workability if all of the mix ingredients are in accurate proportions. When freshly mixed, the concrete must be plastic or semi-fluid so that it can be molded.

High-Performance Concrete

A high-performance concrete mix has a performance strength above 40 MPa. The main purpose of using high-performance concrete is to reduce the weight, creep or permeability issues, and to improve the durability of the structure. Like the normal performance concrete mix, this mix must be plastic or semi-fluid when freshly mixed so that it can be molded.

Because high-performance concrete has a high cement content, it is often sticky and hard to be handled and placed. However, this does not cause the cement to bleed, an issue that normal performance concrete might run into.

Factors affecting concrete mix design

Strength and durability of the concrete mix design are dependent upon the following factors:

Grade designation: Concrete’s strength is measured in N/mm2 when subject to test after curing in any curing medium. The choice of concrete grade depends on its usage.

Choice of cement: Cement choice varies depending on usage. The cement should be tested for performance required by their usage before being tested in the design mix.

Choice of aggregate size: Aggregates needed for each mix is dependent upon the physical properties needed for the design. All aggregates must be quality sized before use.

Type of water: Any water used for concrete mix design should be tested before use to ensure it is within the range of water required for concrete. Most all consumable water is good for concrete work, but should still be tested.

Water to cement ratio: The ratio of water to cement should be tested for consistency, initial and final setting, soundness of the cement, workability, slump of the concrete and compacting factor.

Workability: This is the measure of ease of mixing concrete without segregation or bleeding. It mostly depends on the designed slump of the concrete.

Durability: This is the measure of the required strength (N/mm2) of any concrete grade after 28 days of curing. Durability should be control tested on site.

A quality concrete mix design is crucial for successful construction. At Concrete Supply Co., we sleep better at night knowing our end-to-end ready mix concrete solution meets the highest quality performance in concrete, and our integrity in doing so is unparalleled.

We offer a guide to help you find your perfect read mix. If durability and quality are what you’re looking for in a concrete mix, take a look at our guide and we’ll be sure to help you create the best mix for your project. 

Contact us if you’re in need of a supplier or if you have questions about our mixes.

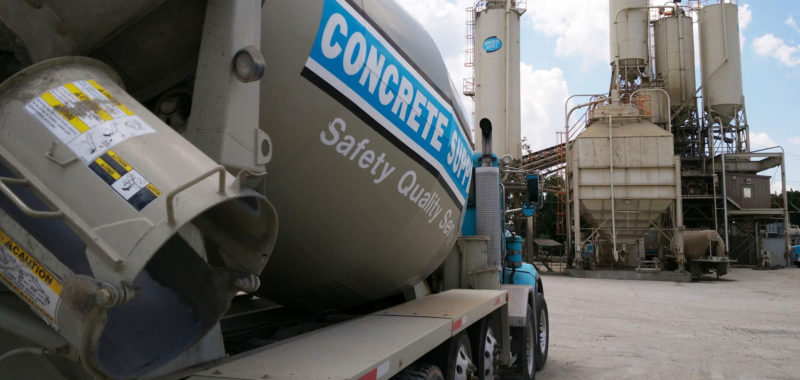
concrete supply mixing plant
2019-02-11T10:29:36-04:00